Train Controller
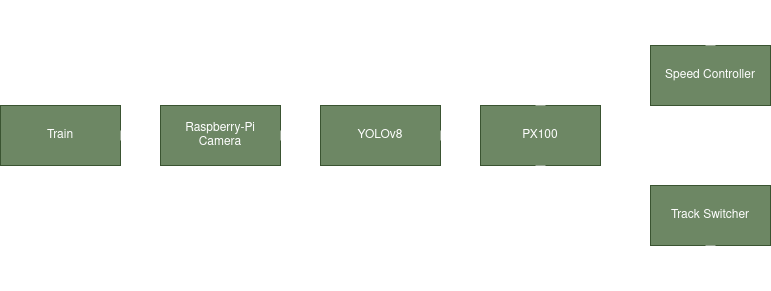
As part of a ten-week-long winter project through Northwestern University’s Master of Robotics program I created a closed loop system in which a four degrees-of-freedom robot controls a model train. The train has a camera attached to the front that recognizes traffic signs along the tracks and sends the names of those recognized signs to a computer that commands the robot to modify the train’s speed or switch the tracks the train is driving on.
A full demo of the train controller, showing Rviz, the train’s perspective, and an overhead view
Data Pipeline
A Raspberry Pi attached to the train’s second car transmits raw image data to the computer that processes that data and determines which signs are present in each frame of the video feed. FFMPEG was utilized as a lightweight way to transmit data over the network from one device to another with relatively low latency. Raspberry Pi’s have built-in hardware to do h264 encoding, so by using a USB webcam that supports that encoding, as well as other FFMPEG optimizations, a latency of 0.2 seconds was achieved which allowing for fairly quick reaction times from camera to computer. From the raw images, image recognition was used to determine which traffic signs were present, and therefore, which commands to send to the robot.
Computer Vision:
YOLOv8 was utilized to impliment image classification on incoming video frames. Training pictures were manually annotated to show the location of the traffic sign in each image. Data augmentation was also utilized to create new photos from the training dataset by artificially modifying already annotated images. Modifications include adjusting the brightness, rotating the image, increasing contrast, and other photo modification methods. Adding these artificially modified images creates a larger training dataset for the model, therefore making a more accurate model.
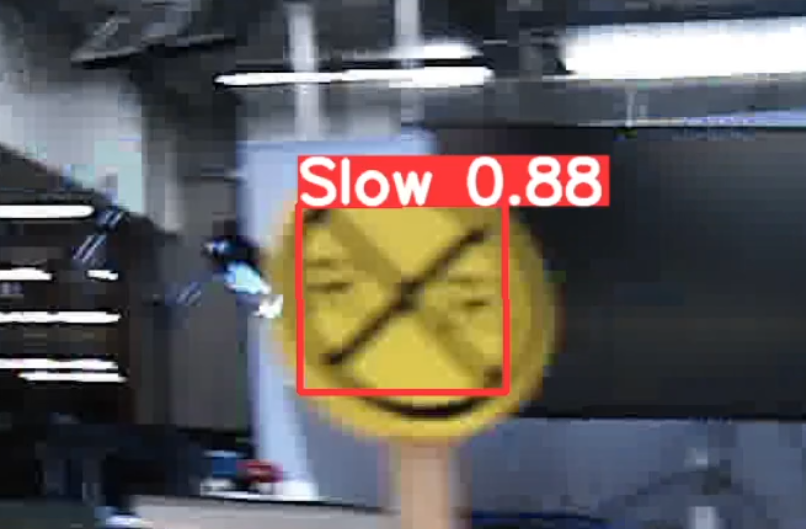
Example of image with a stop sign recognized in it
The image above shows that my model both recognizes that this sign means slow and shows that it is 88% confident that it is a slow sign. The image is smeared because this was taken from a trial run with the train moving, showing that the model can confidently identify which sign is seen while the camera is in motion.
Robot Control
The robot that was chosen for this project was an Interbotix PX100. This robot was chosen for its ease of use and size compared to the dial that controlled the train’s speed. Each time a command came from the sign-detecting portion of the controller each of the different joints of the robot were commanded to move to positions that would adjust the dial to the desired speed or to press the track switching button.
Due to the robot’s limited degrees of freedom, a handle was made for the dial that controlled the speed of the train which allowed the robot to more easily grasp it. The speed controller dial combined with a button on the right side of the setup can control both the speed of the train and the desired track of travel. A plate was 3D-printed to fix the distance between the PX100, the dial, and the track-switching button. The full 3D-printed setup can be seen below.
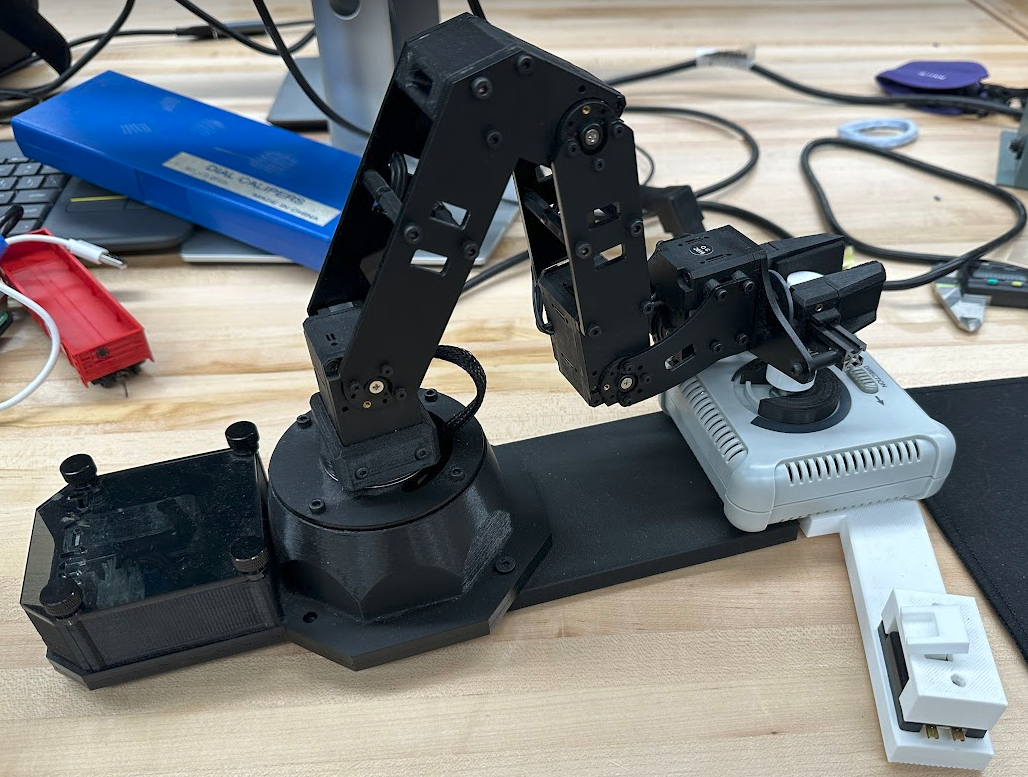
Full robot train controller setup